
Introduction
The competition on social media platforms is extremely high and fast-paced. If you cannot keep up with speed, you will be pushed to the back. There won’t be any increase in followers or improvement in the insights. Thus, you have to optimize social media marketing and also the accounts. But, the main factor on which you have to focus is posting on different social media accounts regularly without fail.
It can be quite a cumbersome task because it needs a lot of editing, choosing proper pictures, selecting the right time to target your audience, and more time. That’s where social media post scheduling comes into play. In this following discussion, we will highlight how to schedule posts on Instagram and Facebook in the best possible manner.
How to schedule post on Facebook?
If you are new to Facebook Creator Studio and don’t know how to use it, you can follow the below guidelines for further knowledge.
Opening the Facebook Creator Studio
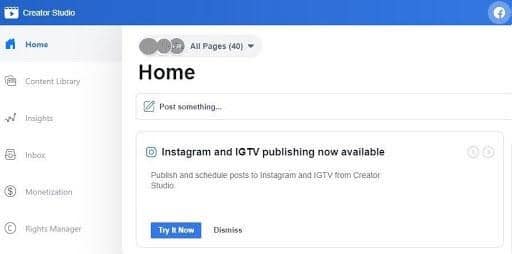
Open the Facebook Creator Studio. You can see all the tabs on the left-hand side column on its home page, starting from monetization to content library. Before opening the Creator Studio, make sure to integrate it with your Facebook business account.
Viewing and selecting the pages
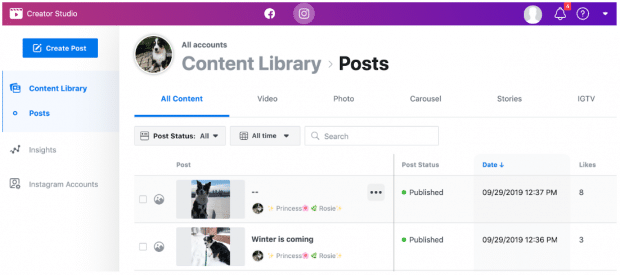
Once you have entered the home page, click on the Content Library option from the left-hand side of the entire page. A dropdown will show three options- Post, Insights, and Preferences.
Click on the Post option from the left-hand dashboard. It will display all the pages related to your profile and the posts you have made on the main screen. Details like status, likes, views, and comments will be published beside each post.
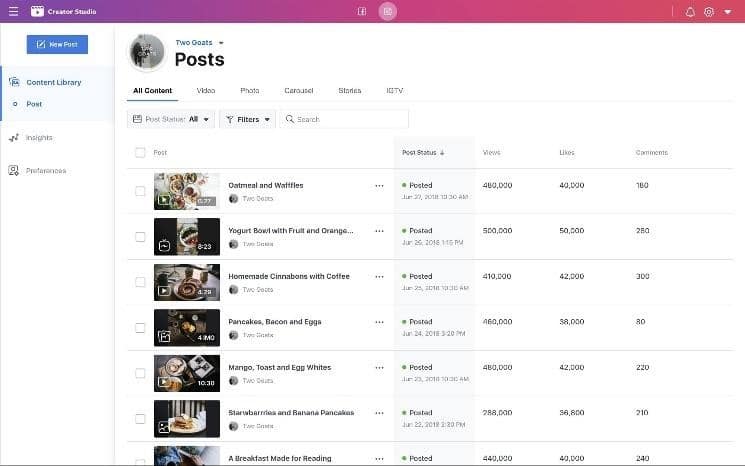
With Creator Studio, you can select single or multiple pages simultaneously. Therefore, scheduling posts across multiple pages under your profile will become easier.
Creation of Facebook posts
The next step will be to create the Facebook posts for the different pages you have selected. After that, you can add both pictures and videos for editing the multimedia content. There are many options that you will have, starting from increasing the brightness and contrast or using a pre-built filter.
You can also crop the images, increase the shadow or vignette, change the color tint, and so on. Apart from this, you can either prepare textual content separately or add the text to the multimedia itself.
Click on Share Now button post editing
After you are done with editing, click on the Share Now button having a grey background. There are two similar buttons for sharing, one with blue and another with a grey colour. Do not click on the blue button mistakenly.
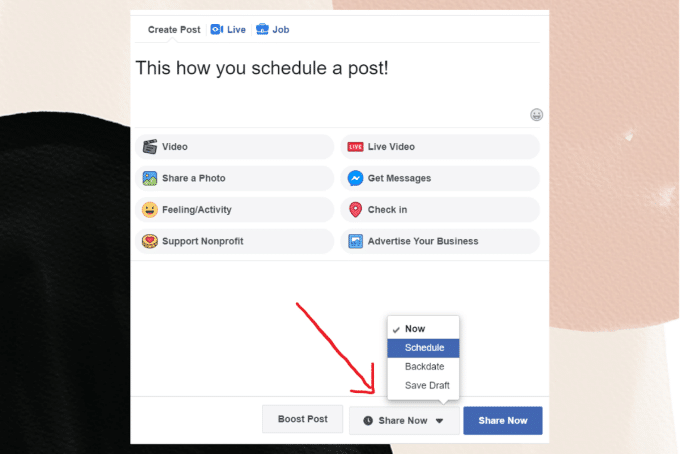
From the drop-down, select the option for schedule. This will allow you to set the desired time and date.
Submit the request and check the status
Once you submit, go to Content Library -> Posts to see whether the ones you have scheduled are being displayed across the pages or not.
How to schedule post on Instagram
Since Instagram is one of the most popular social media platforms for growing your network and getting more followers, you must also learn about using the Creator Studio. Besides, it’s much easier to schedule the posts on Instagram and attract an audience.
Integration of Instagram with Creator Studio
You need to connect all your Instagram accounts with the Creator Studio, along with any page if you have. There is no restriction based on the type of account you have. Once you have established the connection, you are free to schedule the posts.
Click on Instagram Feed from the home page
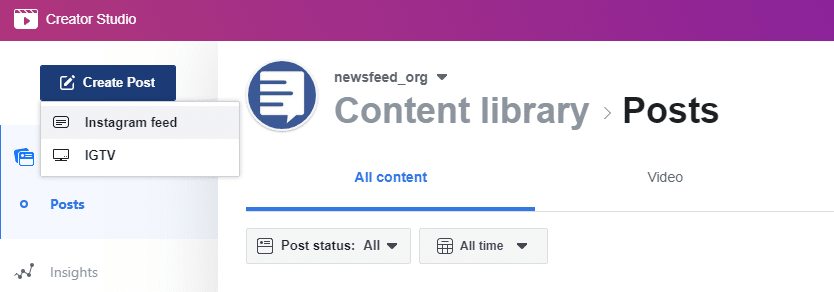
On the home page of Creator Studio, click on Content Library and then on “Create Post”, after which a dropdown will appear for Instagram feed and IGTV.
As we are talking about only Instagram, click on “Instagram Feed” and wait for the response.
Select the account for posting
All your possible Insta accounts will be displayed on the main page. From here, you can select one or more accounts where you want to schedule the post.
Upload multimedia and content for editing
You will be now able to add pictures and videos for editing. Here, you will have two options- uploading from your device or from the Facebook account itself. Once you have selected the convenient option, you can start with the editing process like adding filters, changing the brightness, colour, contrast, warmth, saturation, and so on. You can even crop the pictures as per your requirement.

You can add thirty hashtags and a caption (with character limit of 2,200).
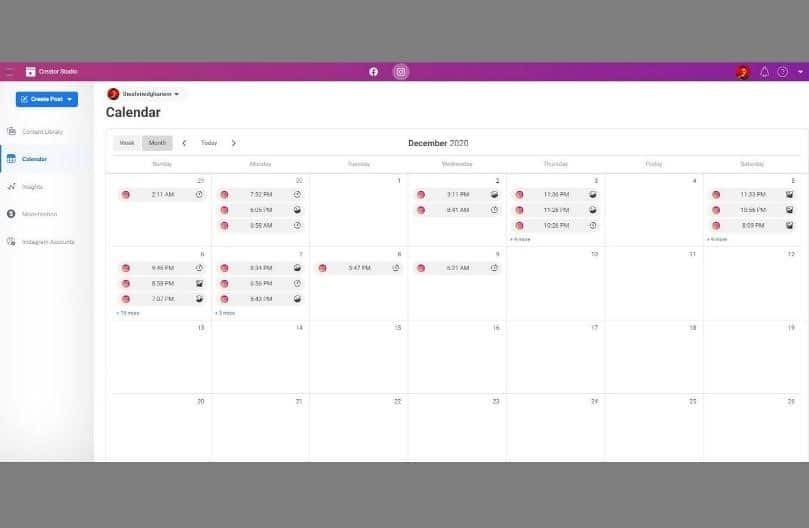
Schedule the date and time for posting
Once done, click on the blue Publish button to have two options- post and schedule. Click on the Schedule button from where the calendar tab will open. Here, you can choose the dates and set the time.
Submit the request and log out
Save and submit the request before logging out. There is no such facility as a draft saver option, which is why you should submit and check whether the posts have been scheduled properly or not.
How to schedule posts via Buffer?
- First you need to log in to Buffer and go to the main dashboard.
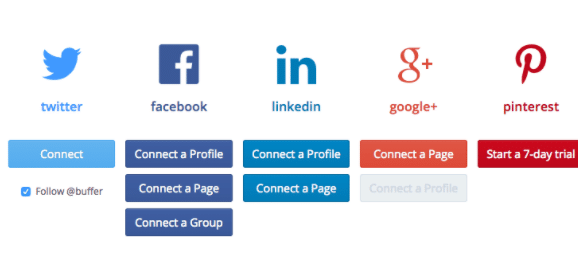
- You can select the options for different social media from the left hand side.
- Once you click on a concerned social media, you can see all the scheduled posts.
- To add a text, select a post and then write the content.

- Click on the Create A Group button to publish the same content on multiple accounts.
- After you are done with it, click the Add To Queue button and your post will get scheduled

Conclusion
The Creator Studio is an outstanding tool where you can schedule the posts for multiple pages, Facebook and Insta accounts, and more, and streamlining the entire process. Just make sure to follow the steps discussed above, and you can get done with the task in no time. This will further ensure proactiveness and show how passionate you are with your social media pages and accounts.
CouchDeck is a trusted brand providing comprehensive digital marketing solutions designed to fuel business growth. As specialists in diverse areas such as SEO, Google Ads, Facebook Ads, SEM, Web Development and Hosting, YouTube Marketing, Local SEO, and Social Media Marketing, CouchDeck has an established track record of delivering consistent, impactful results. Serving a clientele of over 300+ satisfied customers across India, United States, Canada, and Australia, We are committed to helping businesses flourish in the digital landscape. For a FREE consultation, please reach out to us via email at [email protected].