Blocking an IP address in cPanel is a quick and effective way to enhance website security by preventing access from specific IPs. The IP Deny Manager in cPanel simplifies this process, allowing administrators to safeguard their site from potential threats and unauthorized access.
Follow the below steps in order to block an IP Address in cpanel:
Step 1: Login to Cpanel
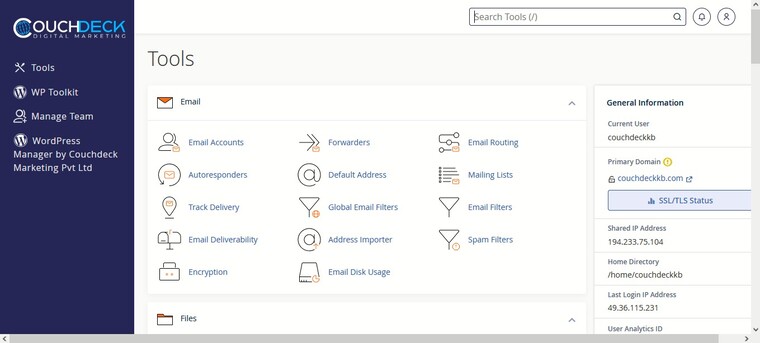
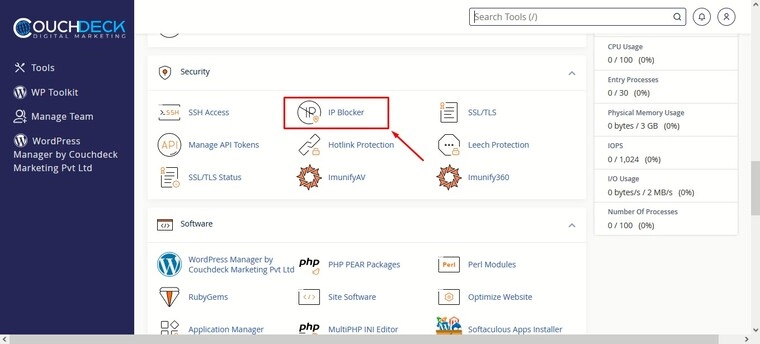
Step 2: Go to Security > IP Blocker
Step 3: Now add the IP Address or domain in the textbox provided and click on “Add“

Step 5: If you see this message, it means you have successfully blocked an IP Address.

Step 6: Now click on the “Go back” button in order to view whether the IP Address you entered is in the blocklist

Step 7: You can view all the IP Addresses in the “Currently-Blocked IP Addresses” Section. You can click on the Delete button in order to unblock any one IP address

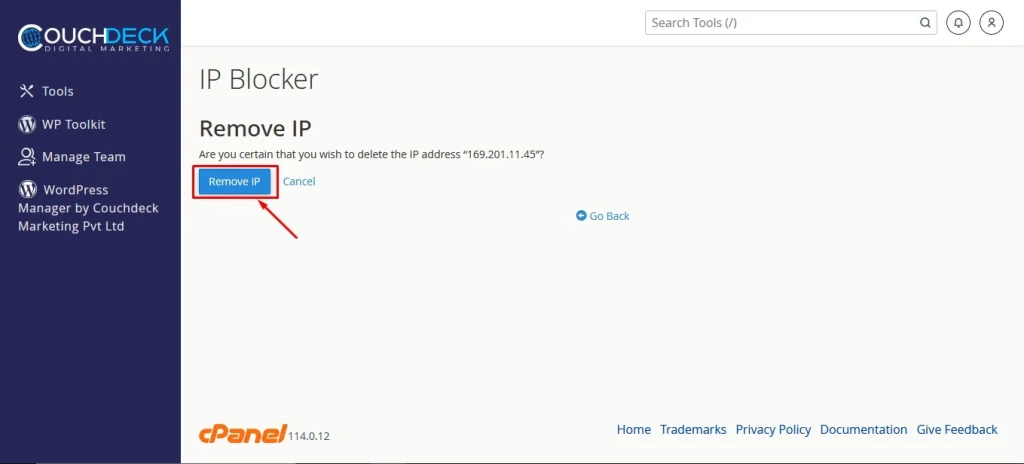
Step 8: If you click on “Delete”, this interface will pop up. In order to remove the IP Address from the blocklist click on “Remove IP“
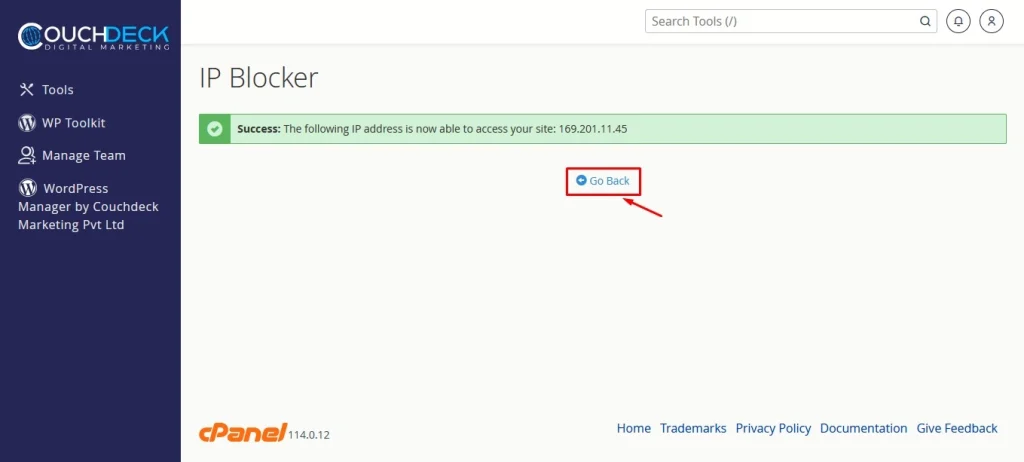
Step 9: If you see this message after clicking on the “Remove IP” button, it means you have successfully unblocked the IP Address

Step 10: Click on the “Go Back” button to see whether the IP address was successfully removed from the blocklist
Step 10: In the “Currently Blocked IP Address” section, the IP Address that was previously blocked would now be unblocked and removed from this section
