In the realm of web hosting, securing sensitive directories is vital for safeguarding online content. cPanel’s Directory Privacy feature offers a robust solution. This guide walks you through implementing Directory Privacy, empowering you to restrict access to specific directories and enhance the security of your data.
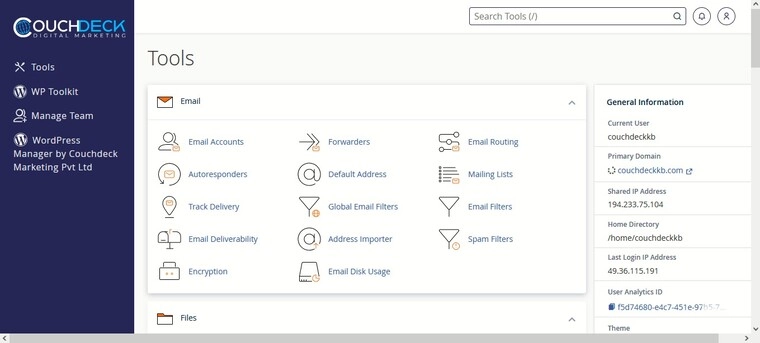
Step 1: Login to Cpanel
Step 2: Go to Files > Directory Privacy
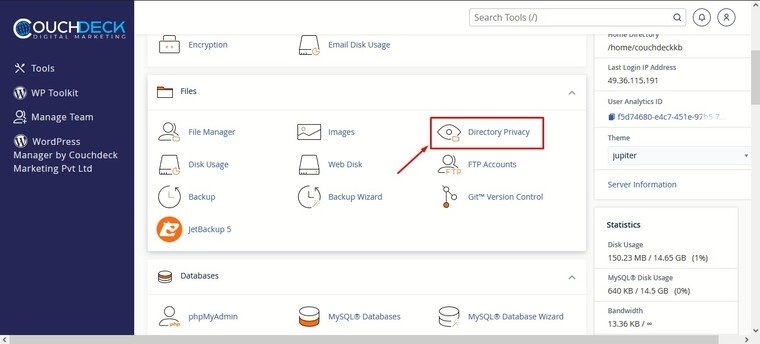
Step 3: Choose the folder/directory you would like to protect and click on the Edit button right next to it

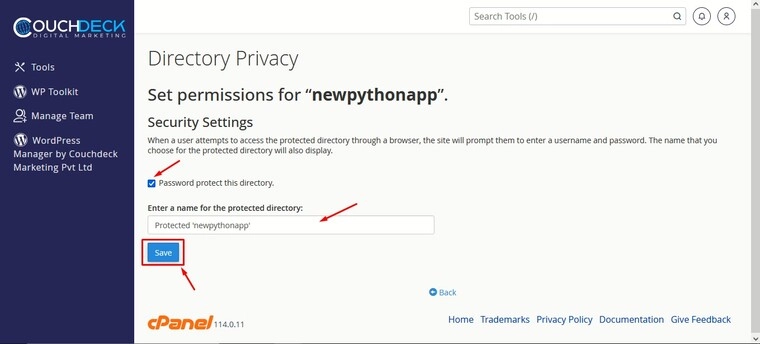
Step 4: Make sure that Password protect this directory checkbox is ticked. Enter the name for protected directory and click on the Save button
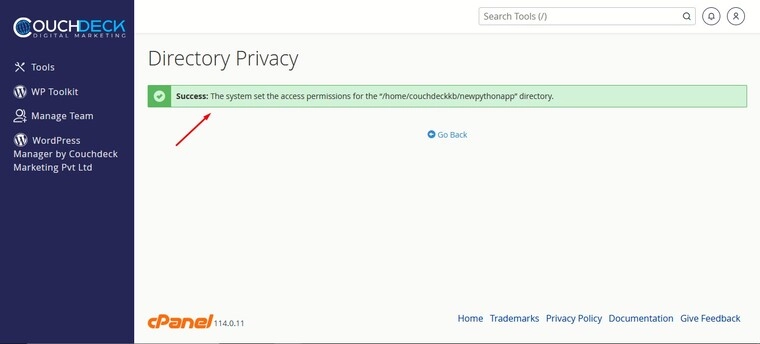
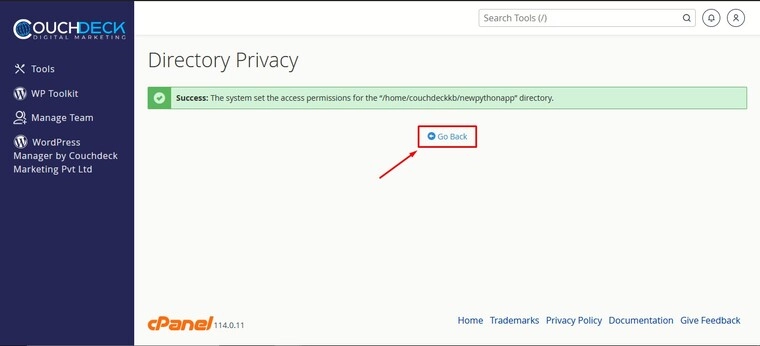
Step 5: If you see this popup message you have successfully made changes to your folder
Step 6: Now click on the Go back button
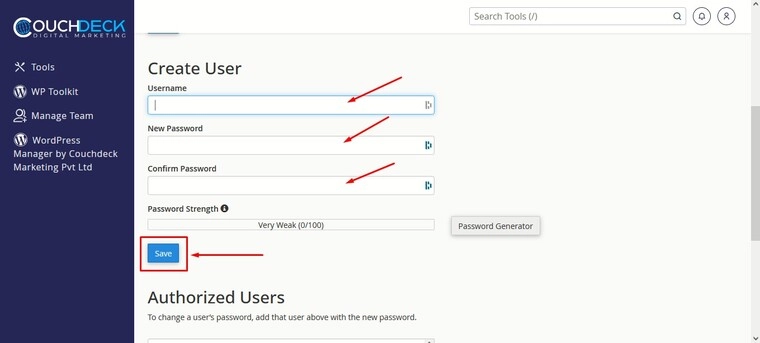
Step 7: Now we need to create a user for this particular folder. Enter the Create User details and click on Save
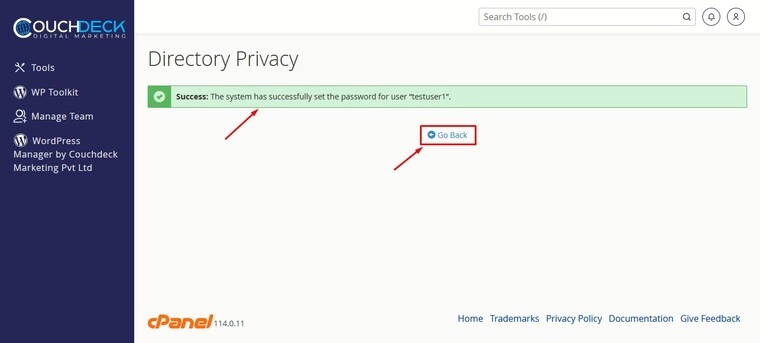
Step 8: If you see this popup message, you have successfully created a user for this folder. Now click on the Go back button
Step 9: Now go back to the cpanel dashboard and go to Files > Directory Privacy and now check the folder you made changes to. If you see this particular icon, you have successfully made changes to your folder.