Changing Nameservers in Hostinger
At Hostinger, easily change the NS records via the DNS Zone Editor.
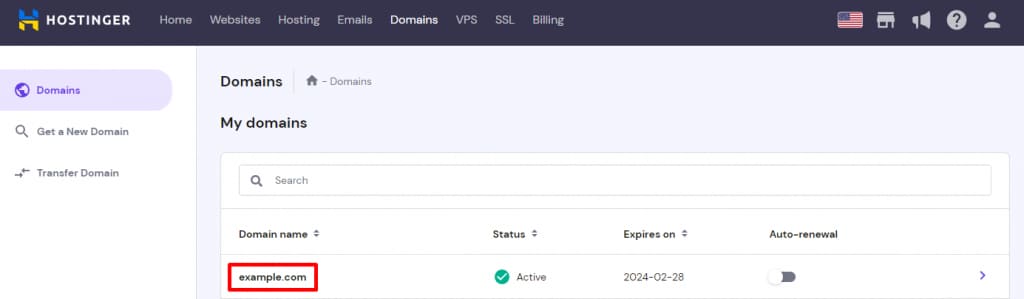
Step 1: Open the Domains section and select your domain.
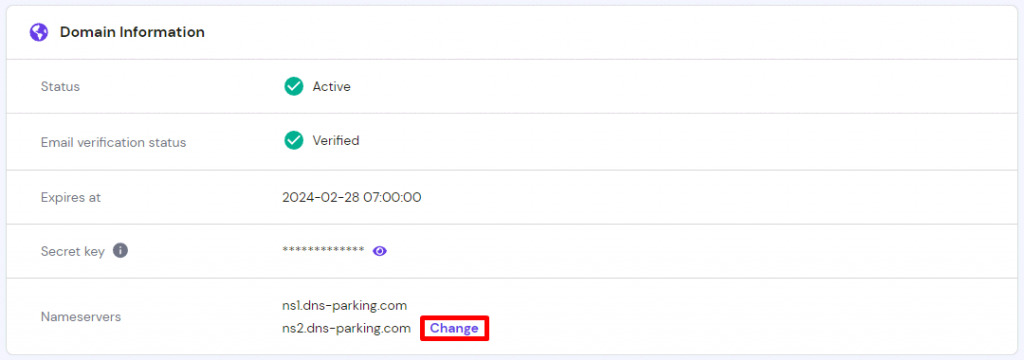
Step 2: Then, proceed to the nameservers management page by clicking the Change button.
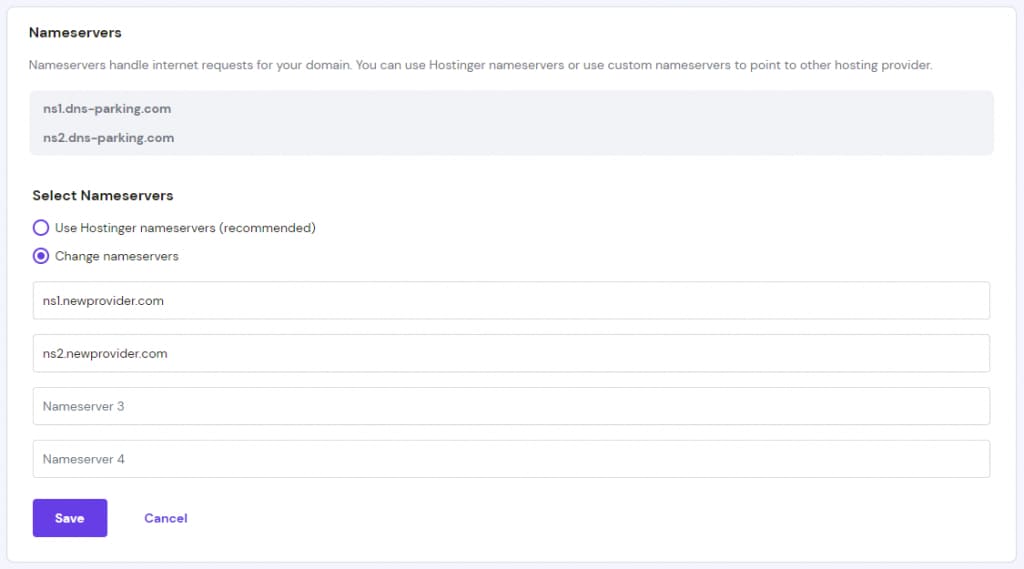
Step 3: For the last step, choose the Change nameservers option, enter new nameservers, and click Save.
Changing Nameservers in GoDaddy
To change the nameservers at GoDaddy:
Step 1: Click the My Account icon and select the Domains quick link.

Step 2: Select the Manage DNS option from the My Domains page.

Step 3: Choose which domain to manage and scroll down to the middle of the page. Then, press Change under the Nameservers section.

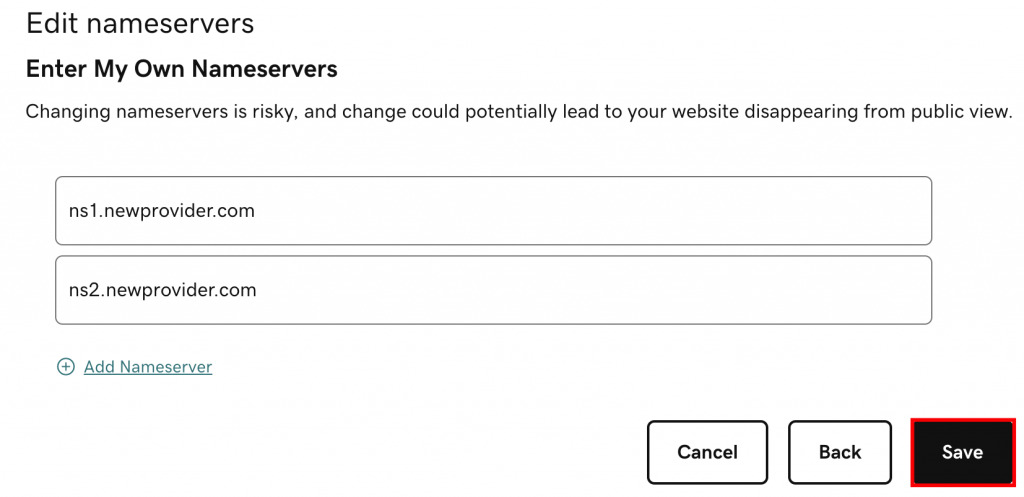
Step 4: Lastly, choose the Enter my own nameservers (advanced) option, enter new nameservers, and click Save.
Changing Nameservers in Namecheap
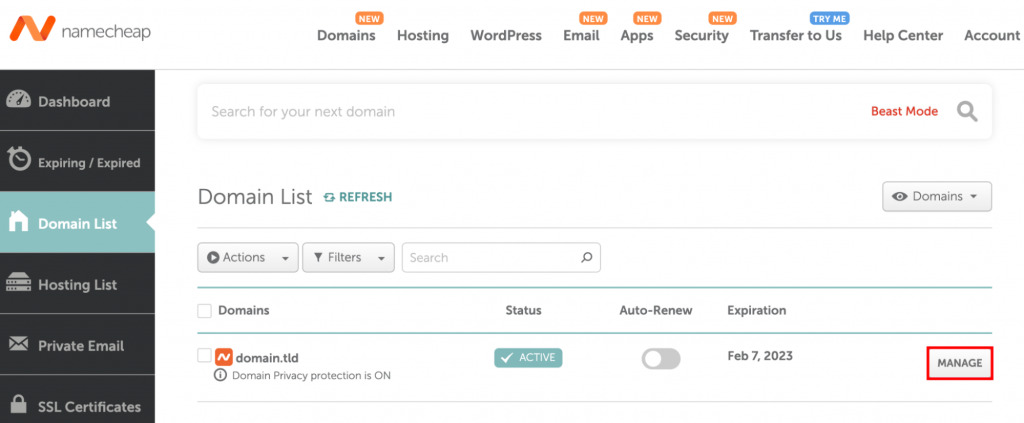
Step 1: If you are using Namecheap, open the Domain List section:
Step 2: Click Manage next to your domain.
Step 3: Find the Nameservers section, select the Custom DNS option, and enter the new nameservers. Save the changes afterward.

Changing Nameservers in Google Domains
Step 1: With Google Domains, open the main dashboard, and select the My domains section:
Step 2: Hit the Manage button next to your domain.

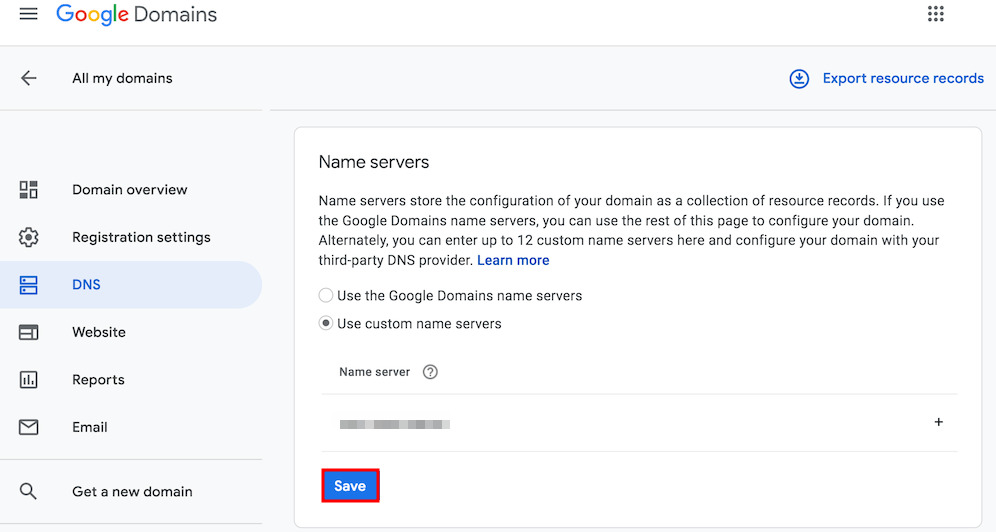
Step 3: Next, navigate to the DNS page.

Step 4: On the DNS page, click the Disable DNSSEC button. This step is necessary to change nameservers successfully.

Step 5: With DNSSEC disabled, find the Name servers section and add the new nameservers. Once done, click Save.
Changing Nameservers in SiteGround
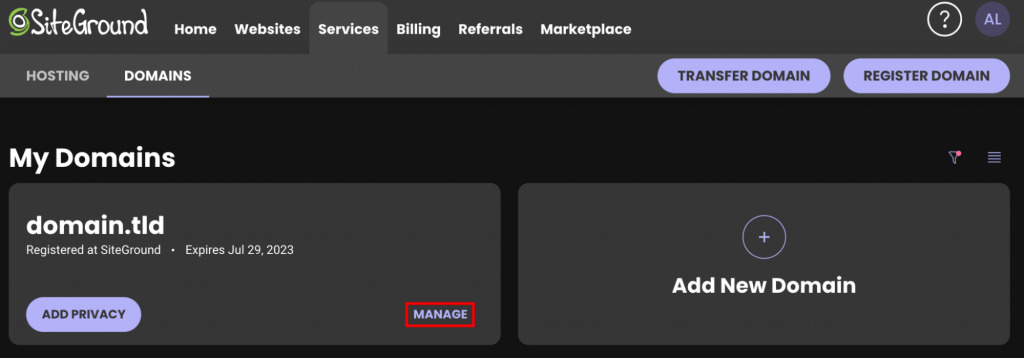
Step 1: At SiteGround, select the Services → Domains section and hit the Manage button near your domain.
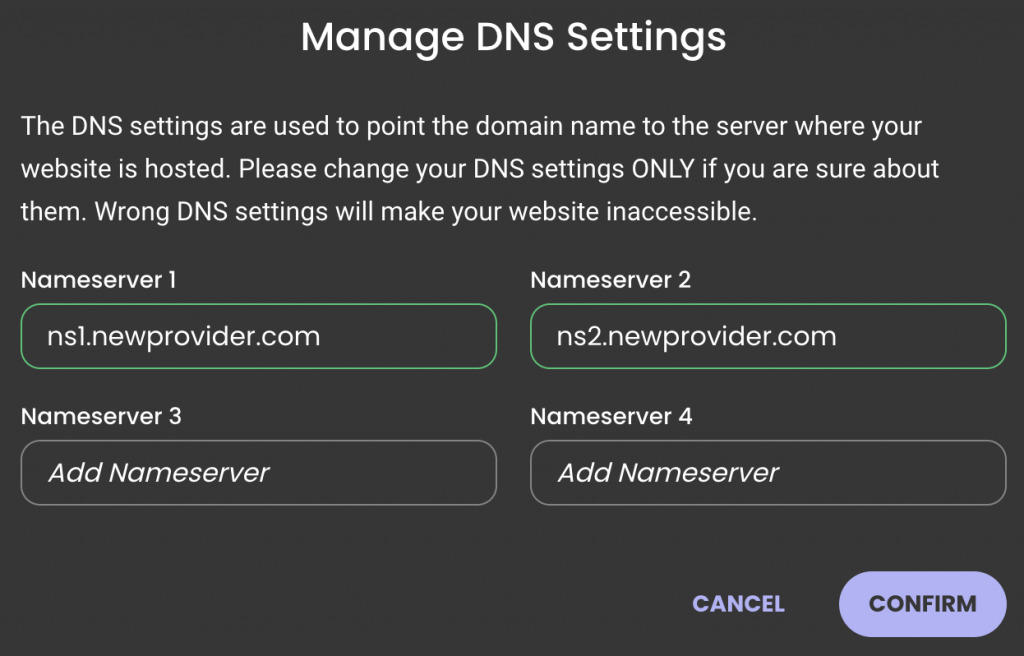
Step 2: Look for the Manage nameservers button on the right side of the screen.

Step 3: Enter the new nameservers on the new page and click Confirm to save the changes.
Changing Nameservers in Bluehost
Step 1: At Bluehost, change nameservers by selecting the My Domains section.
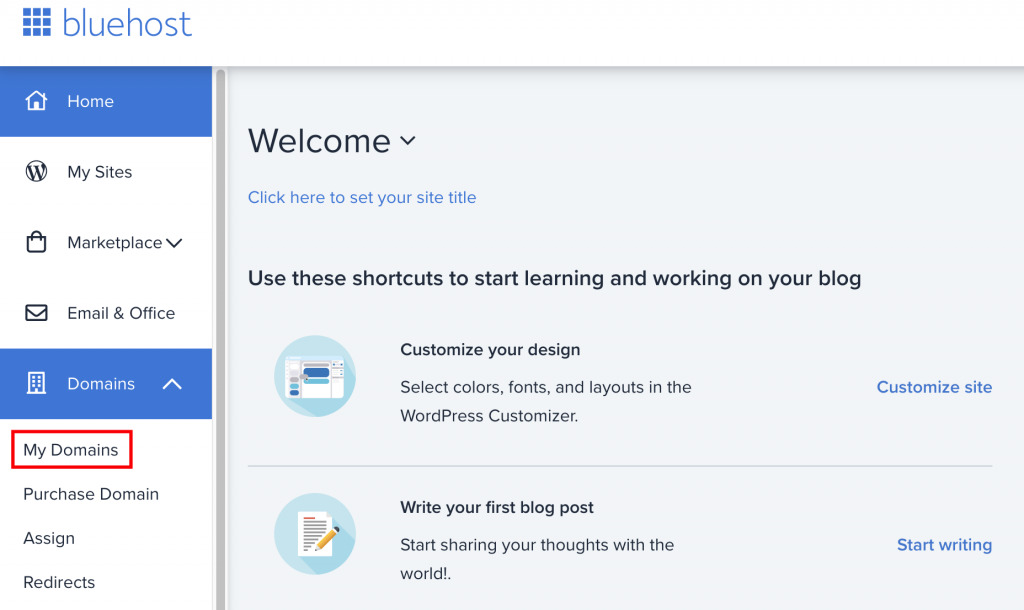
Step 2: Select the preferred domain and click Manage.

Step 3: Open the DNS section and hit the Edit button.
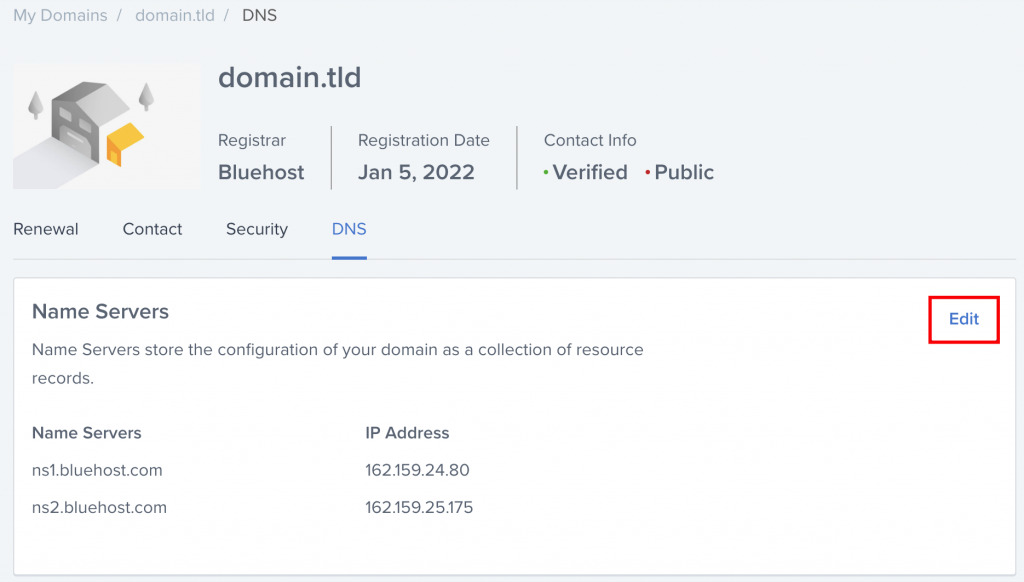
Step 4: Lastly, enter new custom nameservers and save the changes.
Changing Nameservers in Hostgator
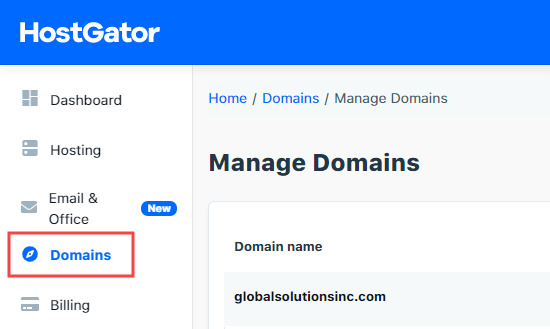
Step 1: Login into your HostGator account.

Step 2: Click on Domains from the left menu. You’ll see your domains.
Step 3: Now, click on the change button to use the custom nameserver.
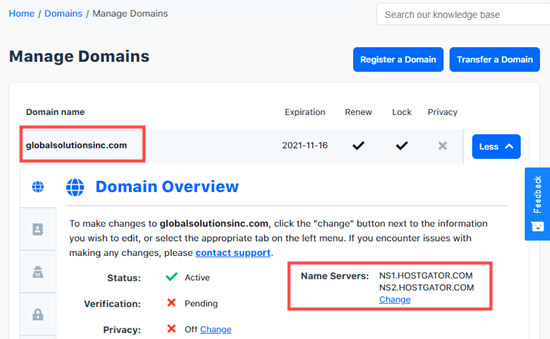
Step 4: Add your custom Nameservers and click on “Save Nameservers”.

How to Update Nameservers at BigRock
After you have purchased our hosting account, you’ll be sent an email welcoming you from us. It will include our nameservers. You must change your nameservers to ours to direct your domain to our hosting.
If the domain is registered with BigRock, You should follow this step to update your domain’s Nameservers with our nameservers.
Step 1: Login into the account you have created with your BigRock account.

Step 2. Visit ->Manage Orders-> List/Search Order to view the list of the domain name registered by you. Click on a domain name to access the settings page for the domain you wish to set up nameservers for.
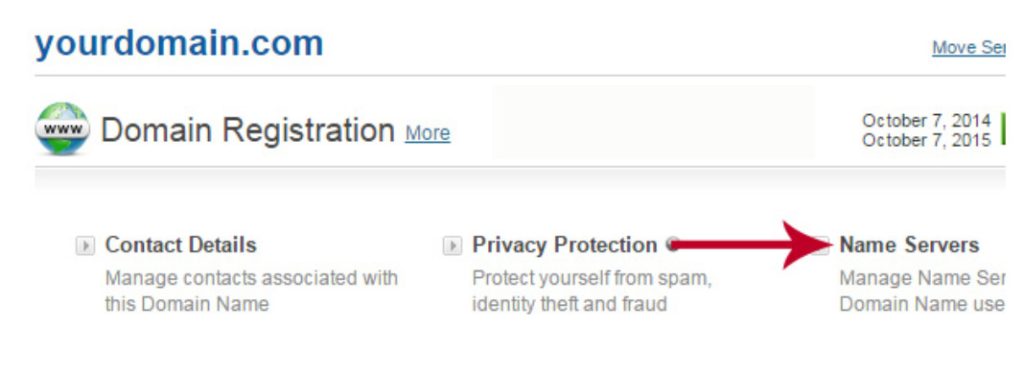
Step 3: Click Nameserver to access the management page for nameservers in an open box. A popup window will open with BigRock’s default nameservers.
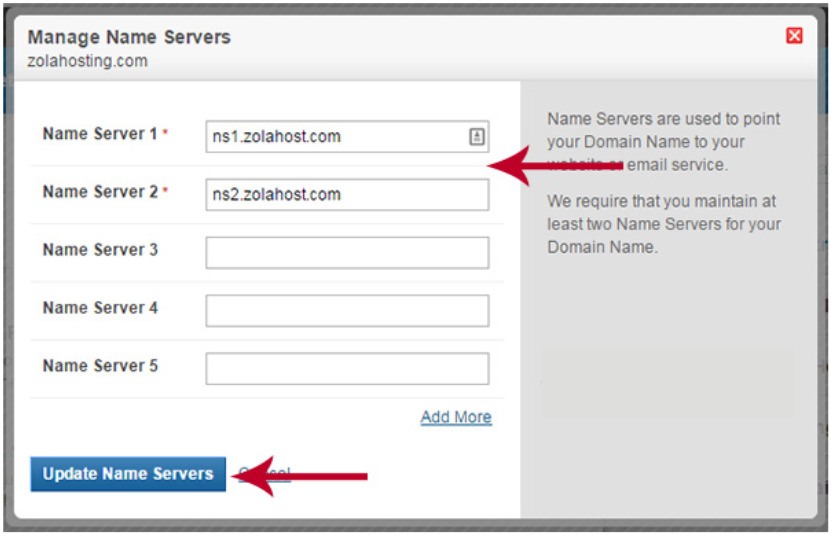
Step 4: Remove the default values and then enter the updated values supplied by your hosting provider. We have registered our nameservers ns1.example.com and ns2.example.com as an example.
Steps to Take After Changing Nameservers
Once the nameservers are set, wait for the changes to take effect. This period is called worldwide DNS propagation and can take up to 24 hours.
While propagation is automatic, users can easily check its progress with such tools as DNS Checker. Just paste in the domain, choose NS as the DNS record type, and click Search.
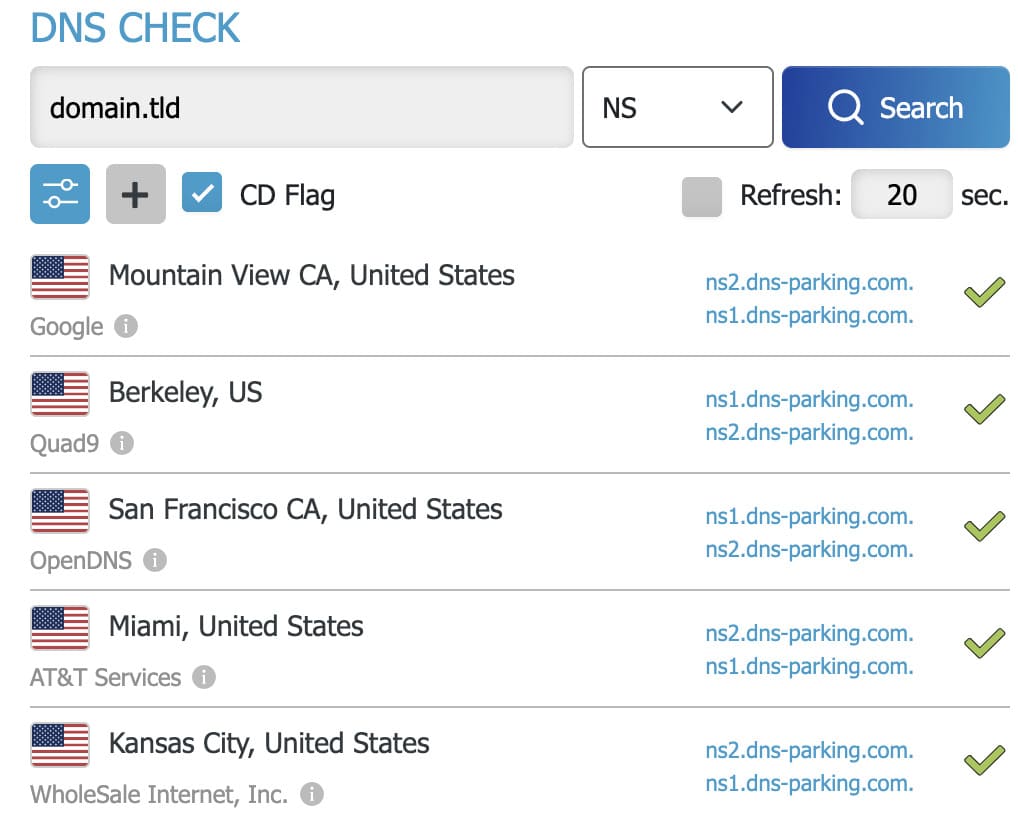
The majority of locations should display the new nameservers. If some locations are not showing new nameservers values even after 24 hours, try to flush the DNS cache.
Conclusion
Changing nameservers is one of the most important steps when switching your hosting provider and pointing the domain elsewhere.
In this tutorial, we’ve explained the different steps you need to take to change nameservers for the most popular hosting providers. Let’s recap the whole process once more:
- Get the new nameserver values
- Apply the new nameservers at the current registrar
- Wait for the propagation process to conclude so that the website is accessible again